Introduction to CareKit
Troy Tsubota • 04 January 2017
CareKit was introduced by Apple in March 2016 to help patients better manage their medical conditions, understand and improve their health, and communicate with their doctor and family members about their care. The framework is open-sourced on GitHub so other developers can contribute.
CareKit comes with 6 modules for developers to use:
- UI Modules:
- The Care Card is used to help the user adhere to their treatment plan.
- The Symptom and Measurement Tracker is fairly self-explanatory—the user tracks his/her symptoms and measurements are taken to determine progress toward improvement.
- Insights uses the data from the Care Card and Symptom Tracker to provide helpful messages and charts for the user to easily see their progress.
- Connect is used to display contact information for the patient’s “Care Team” (doctors, nurses, etc.) and “Personal” contacts (trusted friends/family).
- Data Modules:
- The Care Plan Store is the fundamental data store for CareKit. This is where you store the activities for the Care Card and Symptom Tracker.
- The Document Exporter is used to convert the care data into a PDF or HTML file to print or send in a universal format.
This 3-part tutorial is meant to give an overview of the 6 modules in CareKit. After completing this tutorial, you’ll have an app that:
- Tracks the user’s water intake and exercise.
- Allows the user to enter how long they slept and their current weight.
- Displays a message about the user’s sleep habits and a graph to show how that correlates to completing their treatment plan.
- Exports care data to a PDF that the user can share with contacts.
In this part, you’ll learn what CareKit is and use three modules: the Care Card, Symptom and Measurement Tracker, and Care Plan Store.
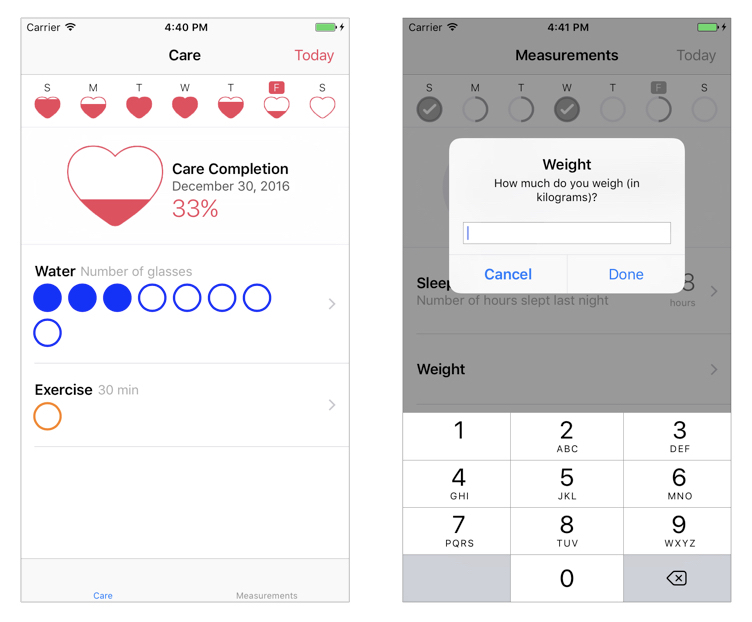
HelloCareKit: the app you'll be building in this tutorial
In Part 2, you’ll use a fourth module, Insights, to use the care data to display user-friendly text and charts to the user.
In Part 3, you’ll learn how to use the last two modules, Connect and Document Exporter.
Prerequisites
You should be familiar with some basic Terminal commands. You can check out linuxjourney.com for a quick tutorial on it.
This tutorial also assumes knowledge of Swift and iOS development. Understanding of Git is also recommended for this tutorial.
Getting Started
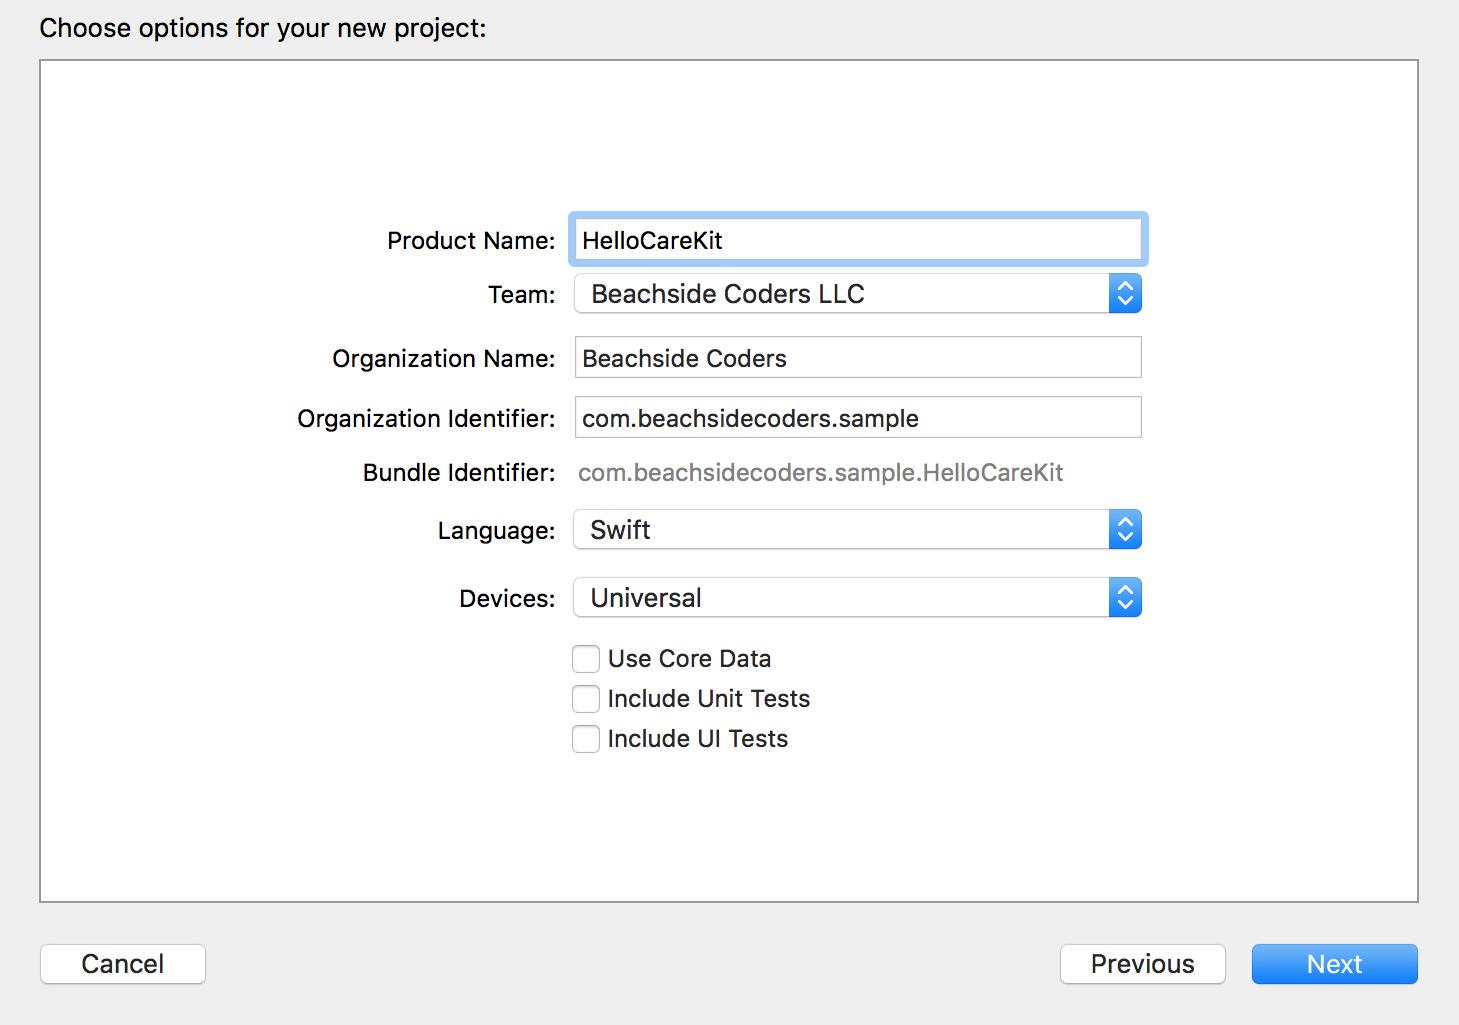
To begin, create a new project in Xcode. Choose Single View Application and name it HelloCareKit. Make sure the language is set to Swift and devices to Universal. Core Data, Unit Tests, and UI Tests are not needed for this tutorial.
In your project, you’ll need to delete ViewController.swift, as you will not be using the default view controller. Select Move to Trash when prompted.
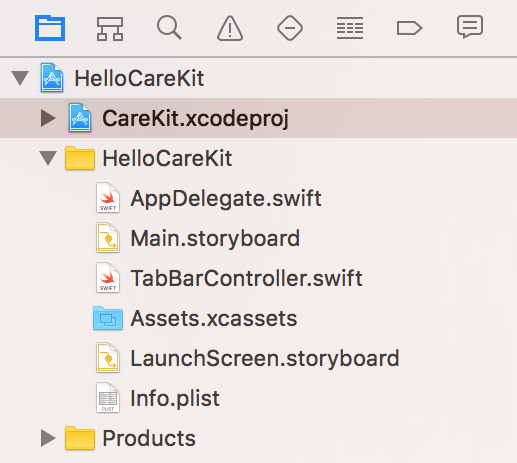
In Main.storyboard, delete the default view controller. Next, drag in a Tab Bar Controller from Utilities (right pane). Delete the two child view controllers created. Select the tab bar controller and check Is Initial View Controller in the Attributes Inspector (fourth tab from left in Utilities) and you should see an arrow to the left of the tab bar controller.
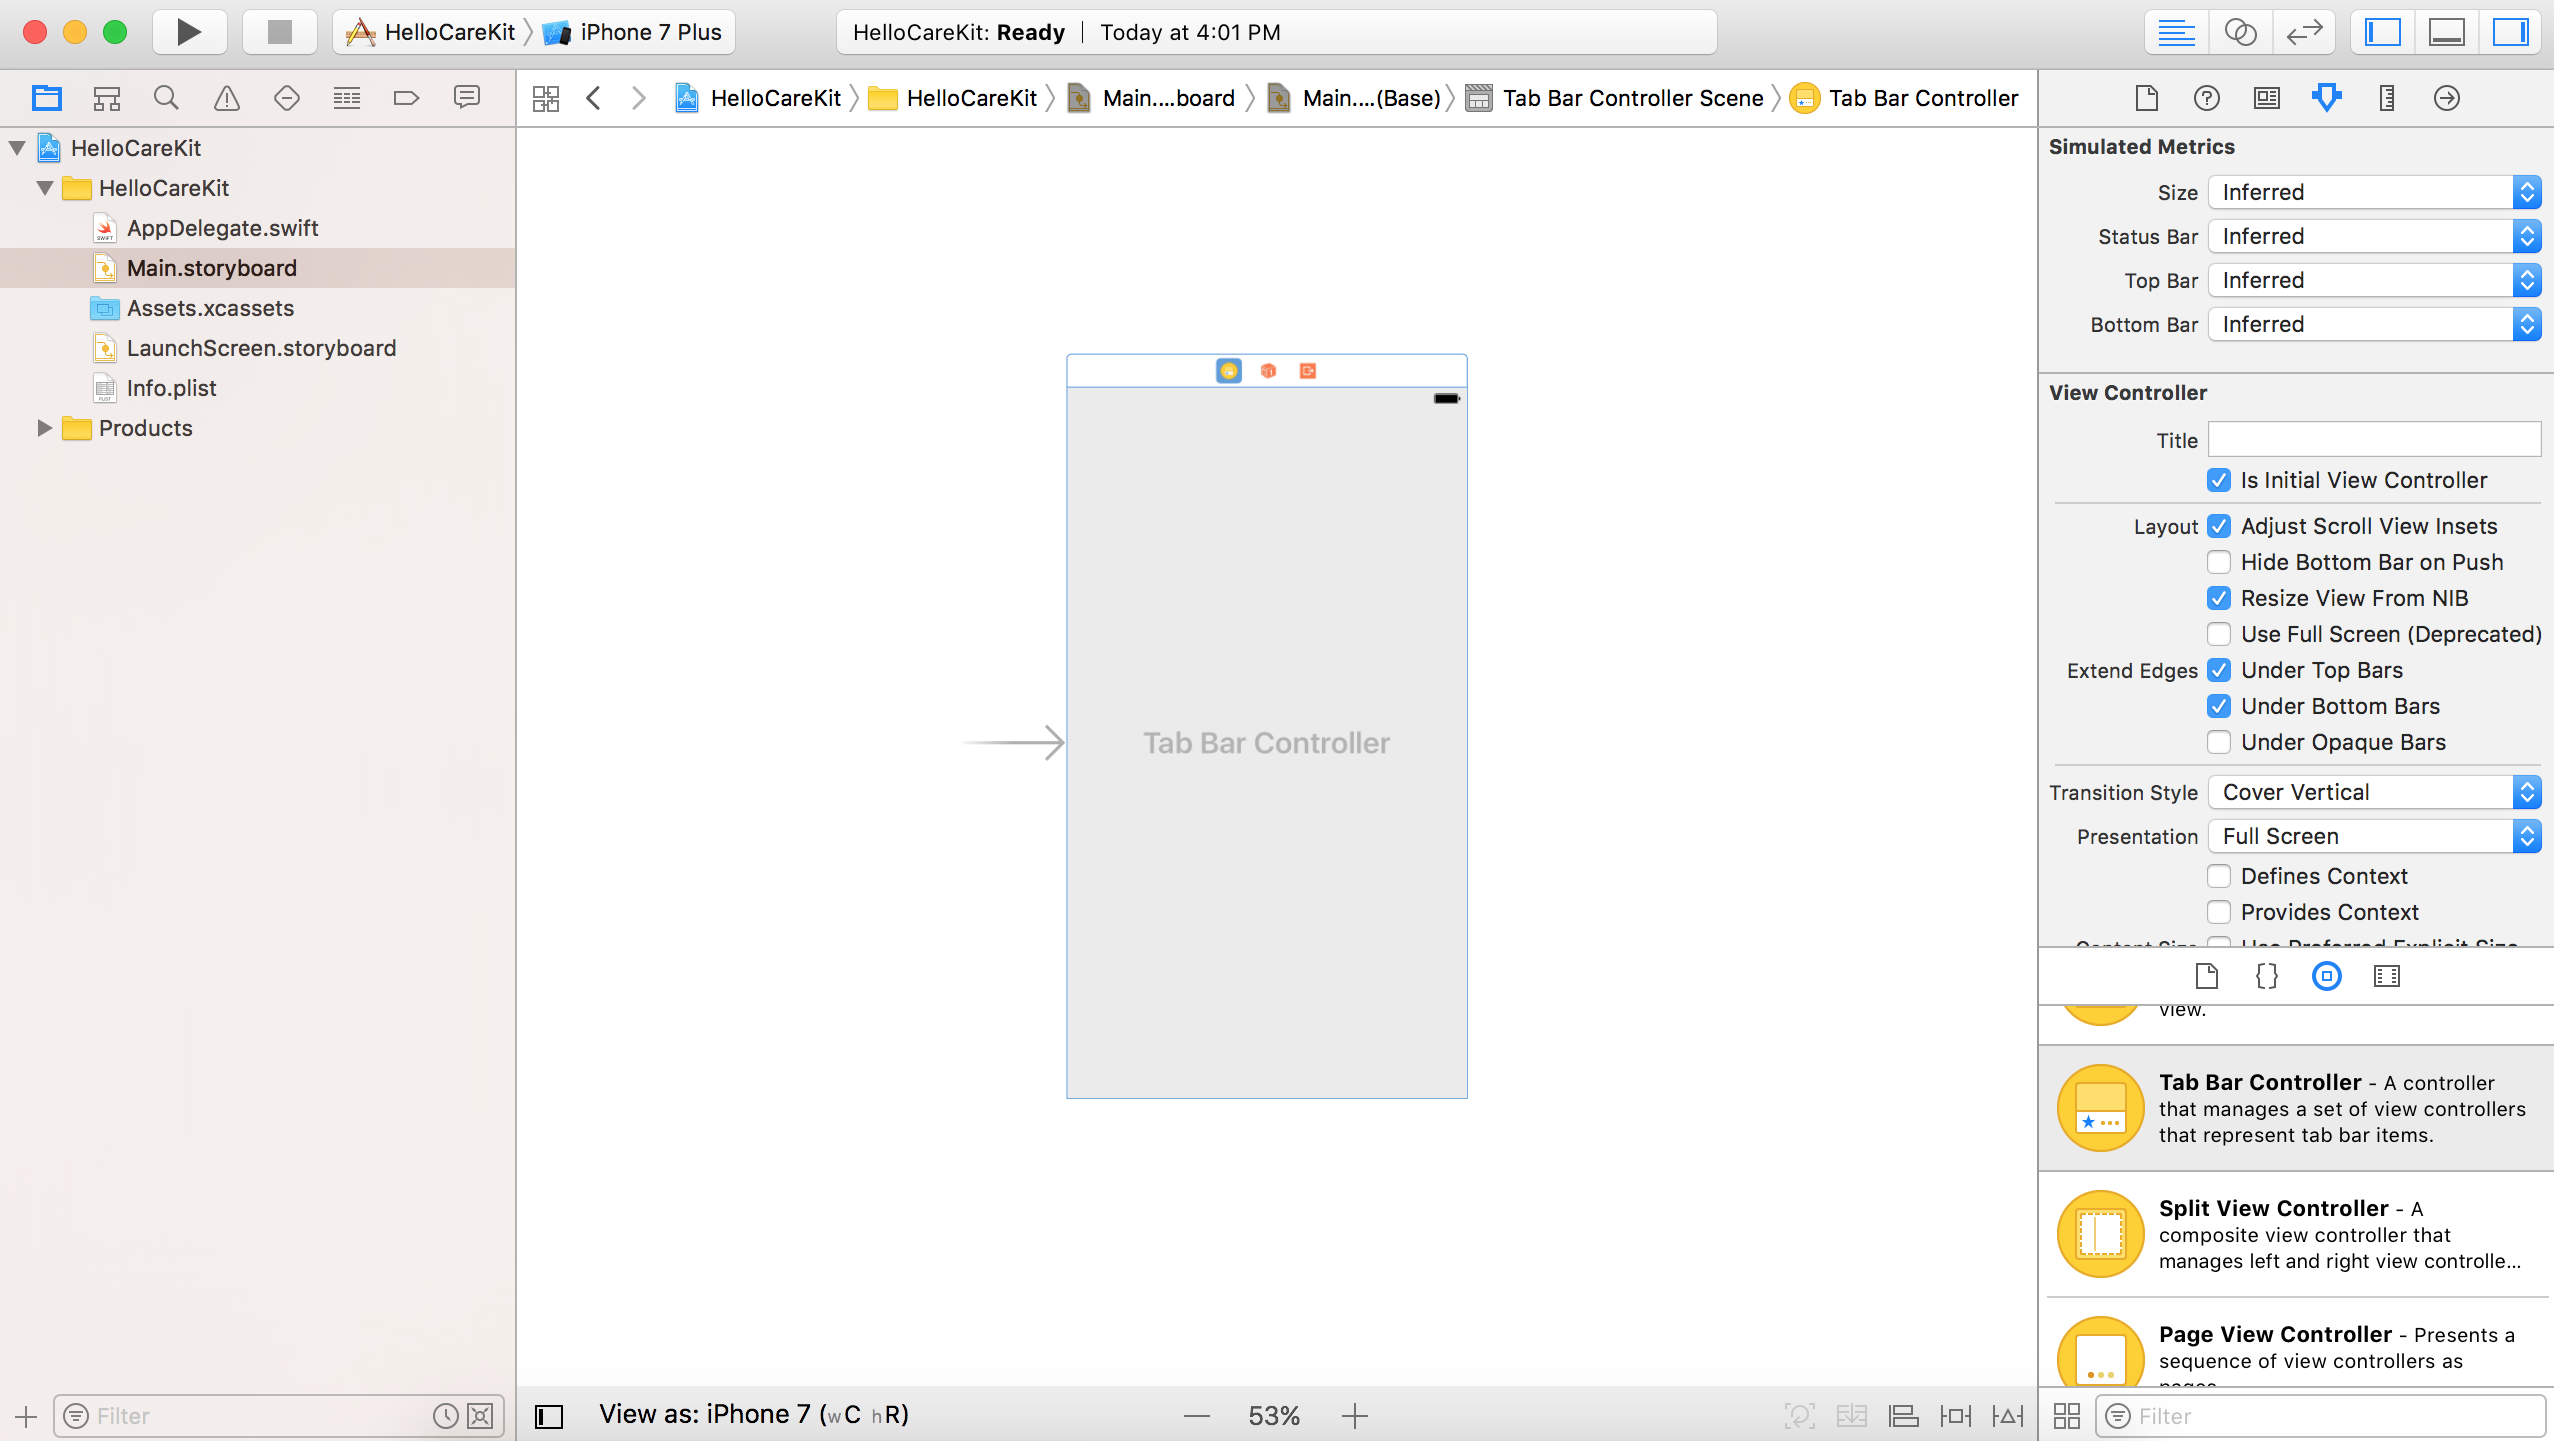
Tab bar controller as the initial view controller
The tab bar controller you just dragged in will contain the CareKit view controllers. You’ll be managing your app through this view controller, so you’ll want to create a UITabBarController subclass.
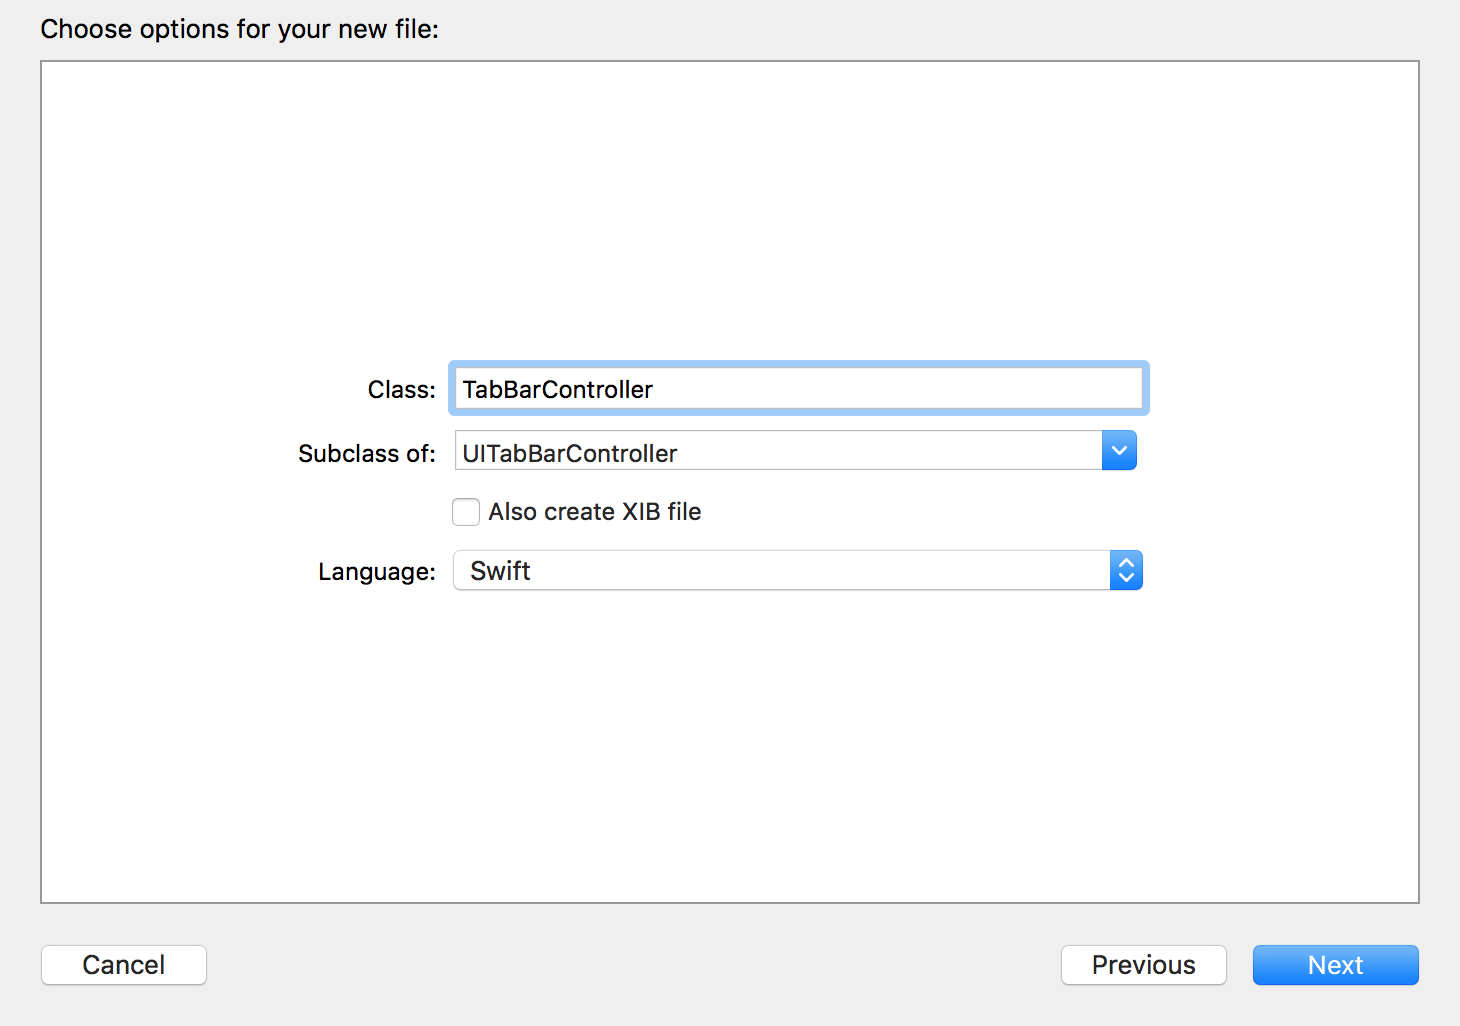
Create a new file, select Cocoa Touch Class, and name the class TabBarController as a subclass of UITabBarController. Also create XIB file should be left unchecked and the language should be set to Swift. Click Next and Create to add it to your project.
To finish setup, go to your storyboard and select your tab bar controller. Open the Identity Inspector (third tab from the left in Utilities) and set the class to TabBarController.
Link CareKit to the project
CareKit can be added to a project in many ways. You can copy CareKit.xcodeproj to your project, use Cocoapods (pod CareKit), use Carthage (github "carekit-apple/CareKit"), or add it as a git submodule.
In this tutorial, you’ll simply copy the project over.
Note: In the sample project on GitHub, CareKit is added as a submodule to simplify the download process.
In Terminal, navigate to the directory you want to clone the repository in and run the following command:
$ git clone -b stable --recurse-submodules https://github.com/carekit-apple/carekit.git
This will clone CareKit (and ResearchKit, its submodule) in your current directory.
Next, open the resulting folder, carekit, and find CareKit.xcodeproj. Drag CareKit.xcodeproj into your HelloCareKit project.
To link the framework to your project, open the project browser (top level HelloCareKit) and find Embedded Binaries. Click + and select CareKit.framework (either one is fine) and click Add. You should now see it in both Embedded Binaries and Linked Frameworks and Libraries.
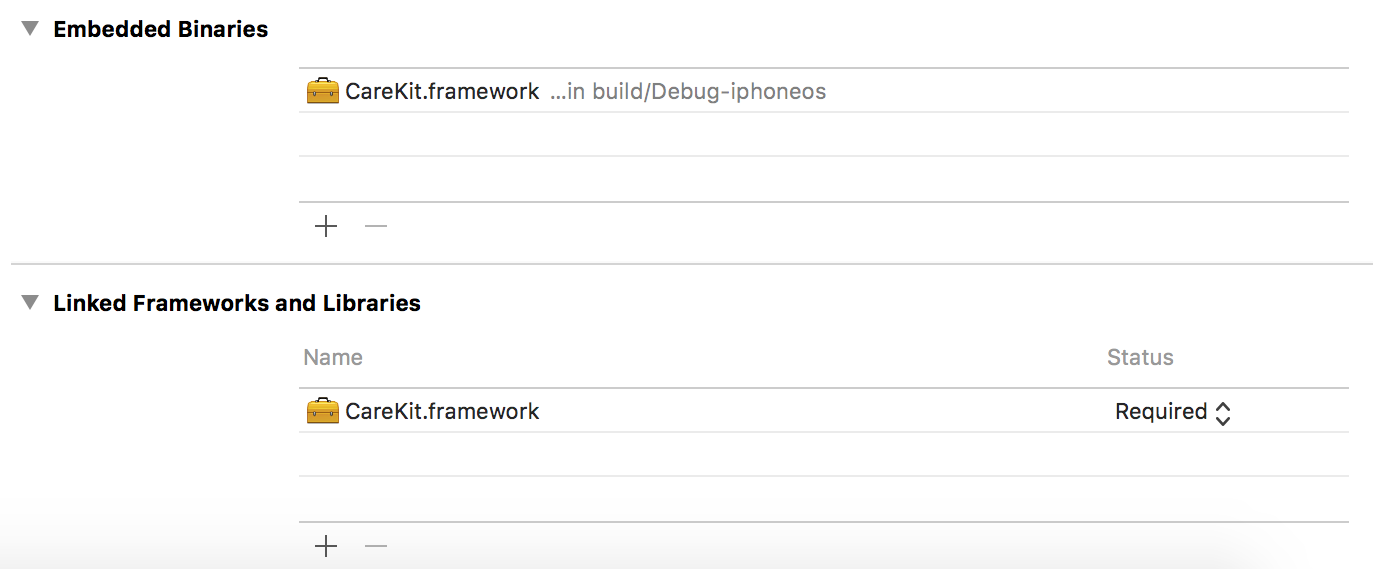
CareKit as an embedded binary and linked framework
Next, replace import UIKit at the top of TabBarController.swift with the following:
import CareKit
Build the project to make sure everything is working properly. If there’s an error, try cleaning the project (shift-command-K) and building again. If there’s still an error, delete CareKit.xcodeproj from the project and try the process again.
The Care Plan Store
The care plan store, OCKCarePlanStore, is the fundamental database for the treatment plan. Most CareKit apps will have one of these to persistently store activities and events for the Care Card and Symptom Tracker between app startups. You’ll learn more about activities and events later on in this tutorial.
In TabBarController.swift, delete the body of the class except for viewDidLoad. Next, add the following at the top, after the class declaration:
lazy var carePlanStore: OCKCarePlanStore = {

}()
This creates a property of the tab bar controller for the care plan store. This variable is lazily instantiated, so it is created when it is accessed. However, unlike computed properties, the value is saved the first time it is calculated and acts like a stored property.
Next, add the following to the store’s instantiation closure:
let fileManager = FileManager.default
let urls = fileManager.urls(for: .documentDirectory, in: .userDomainMask)
let url = urls[0].appendingPathComponent("carePlanStore")

if !fileManager.fileExists(atPath: url.path) {
    try! fileManager.createDirectory(at: url, withIntermediateDirectories: true, attributes: nil)
}

return OCKCarePlanStore(persistenceDirectoryURL: url)
You first fetch the file manager and retrieve any URLs for the Document Directory in the User Domain Mask. You then take a URL from the returned ones (there should only be one in the array) and append carePlanStore to the URL to get the URL for where you will be storing the care plan data.
If something exists at the URL, the app has already created the care plan store directory and it doesn’t have to do anything. If nothing exists, you create a directory at the URL (using try! since it will definitely work—it only fails if the URL doesn’t exist). This is how the care plan data persists between app startups.
Finally, you create an OCKCarePlanStore using the URL and return it as the value of the variable.
Creating the View Controllers
To create the care card and symptom tracker, create an OCKCareCardViewController and OCKSymptomTrackerViewController in viewDidLoad, passing in the care plan store in their initializers:
let careCard = OCKCareCardViewController(carePlanStore: carePlanStore)
careCard.title = "Care"
let symptomTracker = OCKSymptomTrackerViewController(carePlanStore: carePlanStore)
symptomTracker.title = "Measurements"
Next, add the care card and symptom tracker to the tab bar controller, wrapping each of them in a navigation controller:
viewControllers = [
    UINavigationController(rootViewController: careCard),
    UINavigationController(rootViewController: symptomTracker)
]
Build and run to see your empty care card and symptom tracker.
Note: There may be an Xcode warning regarding updating to recommended settings for CareKit. You can go ahead and update it.
Activities and Events
An activity is something the user does to complete their treatment plan. For example, taking a Vitamin D pill twice a day is an activity. Logging your blood pressure every Saturday is also an activity.
There are two types of activities:
- Interventions are for completing tasks. Taking a Vitamin D pill is an intervention.
- Assessments are activities for recording your symptoms. Logging your blood pressure is an assessment.
An easy way to determine if an activity is an intervention or assessment is simple: if the activity is a completion sort of activity where the user either completes it or doesn’t, it’s an intervention. If the activity measures something, then it is an assessment.
Once an activity is created, events, of class OCKCarePlanEvent, are created for the activity. An event is a single occurrence for an activity. For example, in an insulin activity occurring twice a day, one dose of insulin would be an event. You’ll work with events later on in this tutorial.
First, define two methods: one for interventions and another for assessments:
func interventions() -> [OCKCarePlanActivity] {

}

func assessments() -> [OCKCarePlanActivity] {

}
Next, add this property below carePlanStore to define a start date for all the activities:
let activityStartDate = DateComponents(year: 2016, month: 1, day: 1)
Interventions
It’s commonly believed that people need 8 glasses of water per day to stay healthy, so go ahead and add that to your interventions:
let waterSchedule = OCKCareSchedule.dailySchedule(withStartDate: activityStartDate, occurrencesPerDay: 8)
let waterIntervention = OCKCarePlanActivity.intervention(withIdentifier: "water", groupIdentifier: nil, title: "Water", text: "Number of glasses", tintColor: .blue, instructions: nil, imageURL: nil, schedule: waterSchedule, userInfo: nil)
First, you create a variable for the water intervention’s schedule which has the water intervention occur 8 times per day, every day.
You then create your first OCKCarePlanActivity for the water intervention. The parameters are as follows:
identifier: a unique identifier for the activity; used for finding the activity in the care plan store and not creating duplicates of the same activity.groupIdentifier: an identifier for a group of activities for fetching from the care plan store.title: the title for the activity; shown on the care card.text: a subtitle to give more information about the activity; appears next to the title on the care card.tintColor: a color to represent the activity throughout the care card.instructions: instructions for the user; shown in the care card’s detail view.imageURL: a URL for an image to be displayed in the detail view.schedule: the schedule for the activity.userInfo: any extra information you want to store with the activity (ex: medication’s website).
Next, let’s create a slightly more complicated intervention. This time you’ll use a different initializer for the schedule:
let exerciseSchedule = OCKCareSchedule.dailySchedule(withStartDate: activityStartDate, occurrencesPerDay: 1, daysToSkip: 1, endDate: nil)
let exerciseIntervention = OCKCarePlanActivity.intervention(withIdentifier: "exercise", groupIdentifier: nil, title: "Exercise", text: "30 min", tintColor: .orange, instructions: nil, imageURL: nil, schedule: exerciseSchedule, userInfo: nil)
This creates a schedule to exercise every other day. The method for creating the intervention is the same.
Finally, return the interventions as an array:
return [waterIntervention, exerciseIntervention]
Assessments
Before you create the assessments, you need to first create a oncePerDaySchedule that can be used for the assessments you’ll be making. Add this to assessments:
let oncePerDaySchedule = OCKCareSchedule.dailySchedule(withStartDate: activityStartDate, occurrencesPerDay: 1)
Now that you have that, create your first assessment to ask how long the user slept:
let sleepAssessment = OCKCarePlanActivity.assessment(withIdentifier: "sleep", groupIdentifier: nil, title: "Sleep", text: "How many hours did you sleep last night?", tintColor: .purple, resultResettable: true, schedule: oncePerDaySchedule, userInfo: nil)
This might look very similar to creating interventions. The only difference is that there is no instructions or imageURL (as there is no built-in detail view controller for the symptom tracker) and there is an addition of the resultResettable parameter. While its semantics are that the result shouldn’t be changed, setting resultResettable by itself doesn’t do anything. It is simply for developers to use themselves if they want to use it.
Let’s make another assessment, this time asking for the user’s weight:
let weightAssessment = OCKCarePlanActivity.assessment(withIdentifier: "weight", groupIdentifier: nil, title: "Weight", text: "How much do you weigh?", tintColor: .brown, resultResettable: true, schedule: oncePerDaySchedule, userInfo: nil)
Lastly, return the assessments:
return [sleepAssessment, weightAssessment]
Adding the Activities to the Store
You can now create the method to add the activities you just created to the care plan store:
func addActivities() {
    for activity in interventions() + assessments() {
        self.carePlanStore.add(activity) { (_, error) in
            guard let error = error else { return }
            print(error.localizedDescription)
        }
    }
}
You loop through the interventions and assessments you made and add them to the care plan store. The process is handled asynchronously and has a completion handler. You check to see if anything went wrong, otherwise you return.
Finally, in viewDidLoad, add this line after calling super.viewDidLoad():
addActivities()
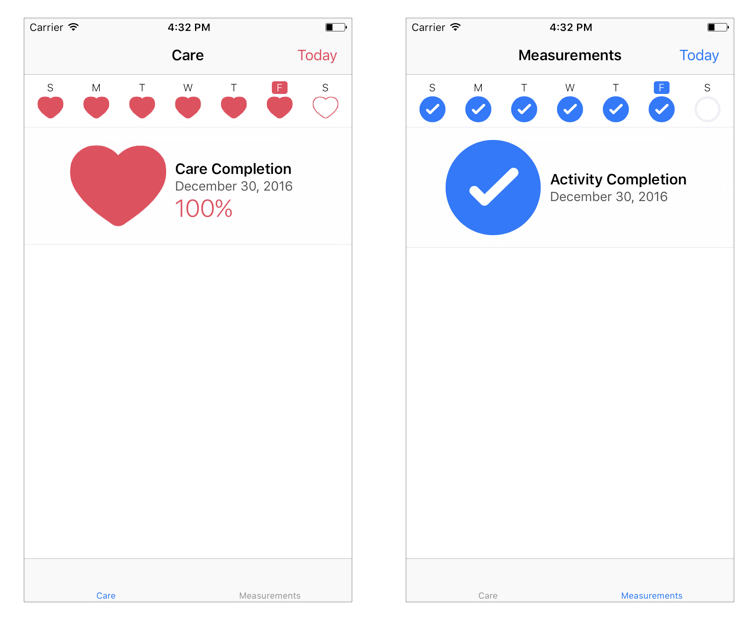
Build and run and you should see the care card and symptom tracker filled in with the activities you created (if you happen to fall on a day with no exercise, tap and/or swipe the week view on the top row to go back days).
Fill in a couple circles and admire your hard work. Now to check if the data persists, stop the app and run it again.
Yes! It worked! But…

Uh oh! It appears that errors are being printed when adding the activities. Let’s inspect the errors:
The operation couldn't be completed. (OCKErrorDomain error 2.)
The operation couldn't be completed. (OCKErrorDomain error 2.)
...
The error seems to appear as many times as the number of activities you created.
This error occurs when you try to add an already existing activity to the care plan store. To fix this, rewrite your addActivities method to look like this:
carePlanStore.activities { [unowned self] (_, activities, error) in
    if let error = error {
        print(error.localizedDescription)
    }
    guard activities.count == 0 else { return }

    for activity in self.interventions() + self.assessments() {
        self.carePlanStore.add(activity) { (_, error) in
            guard let error = error else { return }
            print(error.localizedDescription)
        }
    }
}
This fetches all the activities in the care plan store. After checking for errors, you check if there’s anything that was returned. If there wasn’t, that means you haven’t added the activities yet and you can continue to add them. Otherwise, the method returns and nothing happens.
Build and run and admire your empty console.
Implementing the Symptom Tracker Delegate
You may have noticed that when you tried to complete your assessments in the symptom tracker, nothing happens. That’s because you haven’t programmed anything to happen yet!
In order to do that, you need to assign a delegate to the symptom tracker. The protocol, OCKSymptomTrackerViewControllerDelegate, provides two methods:
symptomTrackerViewController(_ viewController:, didSelectRowWithAssessmentEvent:)provides a way to handle row selection in the symptom tracker. You’ll be using this method to display an alert asking for the user’s input.symptomTrackerViewController(_ viewController:, willDisplayEvents:, dateComponents:)provides a place to perform any code as the symptom tracker displays events. You won’t be using this in this tutorial.
Add the following in viewDidLoad (after setting the symptom tracker’s title) to assign the delegate to the tab bar controller:
symptomTracker.delegate = self
Next, at the very bottom of the file, outside of the class declaration, add an extension to have the tab bar controller conform to the delegate protocol:
extension TabBarController: OCKSymptomTrackerViewControllerDelegate {

}
Now implement the row selection method for the symptom tracker:
func symptomTrackerViewController(_ viewController: OCKSymptomTrackerViewController, didSelectRowWithAssessmentEvent assessmentEvent: OCKCarePlanEvent) {

}
When the user selects a row, this method will get called with the event that was selected being passed through.
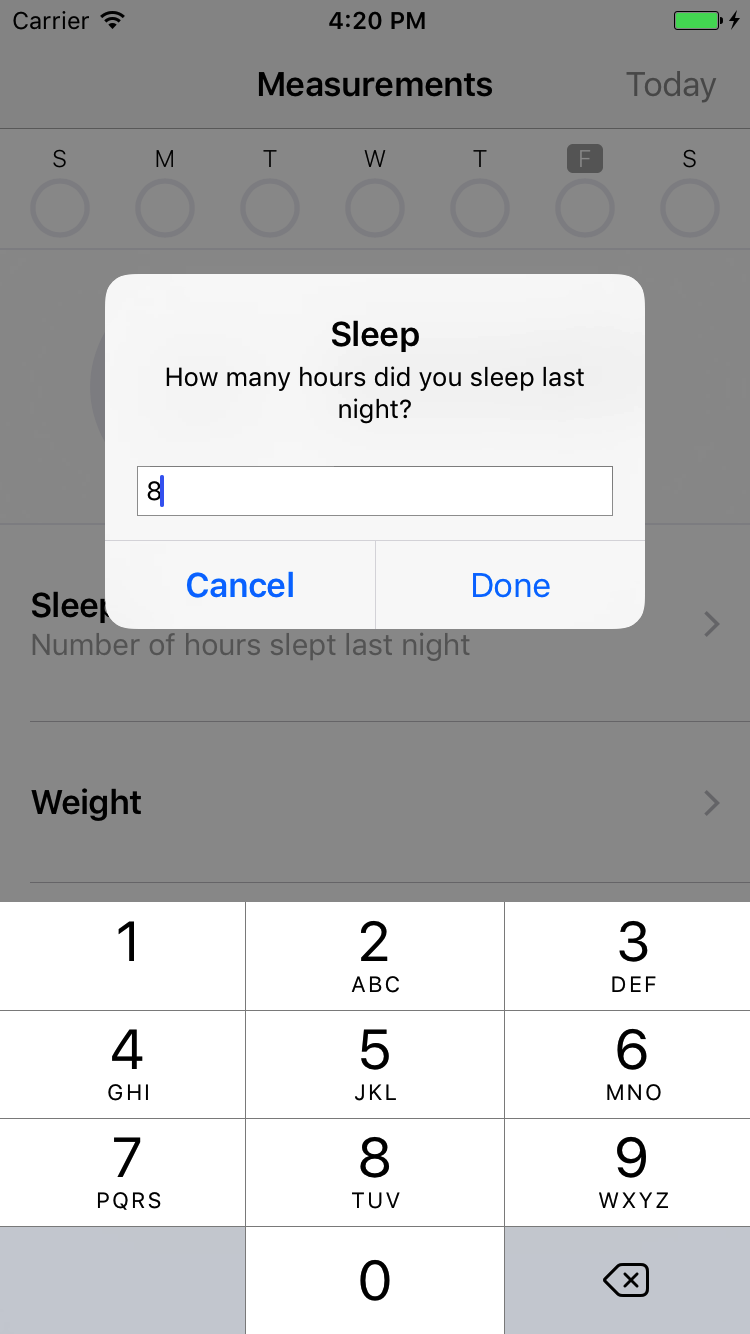
The idea is to display an alert when the user wants to input their sleep. Define a helper method that returns an alert controller to present:
func sleepAlert(event: OCKCarePlanEvent) -> UIAlertController {
    let alert = UIAlertController(title: "Sleep", message: "How many hours did you sleep last night?", preferredStyle: .alert)

    alert.addTextField { textField in
        textField.keyboardType = .numberPad
    }

    let doneAction = UIAlertAction(title: "Done", style: .default) { [unowned self] _ in
        let sleepField = alert.textFields![0]
        let result = OCKCarePlanEventResult(valueString: sleepField.text!, unitString: "hours", userInfo: nil)
        self.carePlanStore.update(event, with: result, state: .completed) { (_, _, error) in
            if let error = error {
                print(error.localizedDescription)
            }
        }
    }
    alert.addAction(doneAction)

    return alert
}
What this method does:
- You first create an alert controller to ask how many hours the user slept.
- You then add a text field to the alert so the user can type in the hours. The handler sets the text field to be a numpad so the user can only type numbers.
- Next, you create an alert action. This one, titled “Done”, fetches the text inside the text field and assigns that to the value of an
OCKCarePlanEventResult. The event is then updated with the result (and prints an error if there is one). This alert action is added to the alert. - The alert is returned.
Let’s now create a nearly identical alert to ask for the weight:
func weightAlert(event: OCKCarePlanEvent) -> UIAlertController {
    let alert = UIAlertController(title: "Weight", message: "How much do you weigh (in kilograms)?", preferredStyle: .alert)

    alert.addTextField { textField in
        textField.keyboardType = .numberPad
    }
    let doneAction = UIAlertAction(title: "Done", style: .default) { [unowned self] _ in
        let weightField = alert.textFields![0]
        let result = OCKCarePlanEventResult(valueString: weightField.text!, unitString: "kg", userInfo: nil)
        self.carePlanStore.update(event, with: result, state: .completed) { (_, _, error) in
            if let error = error {
                print(error.localizedDescription)
            }
        }
    }
    alert.addAction(doneAction)

    return alert
}
With the helper methods created, you can now fill in the delegate method:
let alert: UIAlertController

if assessmentEvent.activity.identifier == "sleep" {
    alert = sleepAlert(event: assessmentEvent)
} else if assessmentEvent.activity.identifier == "weight" {
    alert = weightAlert(event: assessmentEvent)
} else {
    return
}
You check the identifier for the event’s activity to determine which alert to assign to the alert variable.
Next, add the following:
let cancelAction = UIAlertAction(title: "Cancel", style: .cancel, handler: nil)
alert.addAction(cancelAction)
This simply creates a cancel alert action that does nothing.
Finally, present the view controller:
present(alert, animated: true, completion: nil)
Build and run and input some data into the symptom tracker.
What’s next?
In this part of the tutorial, you learned how to:
- Link CareKit to a new or existing project.
- Create three of the six CareKit modules: the Care Plan Store, the Care Card, and the Symptom and Measurement Tracker.
- Make interventions and activities.
- Define the symptom tracker delegate.
You can download the finished project from this part on GitHub.
This is only scratching the surface of what’s possible with CareKit. In Introduction to CareKit, Part 2, you’ll explore another CareKit module, Insights, to show a graphical representation of the data from the care plan store.
If you have any questions, feedback, or tutorial requests, feel free to open an issue on GitHub. I hope you enjoyed this tutorial!